
Midjourney puts the power in your hands to turn your ideas into jaw-dropping images. No artist’s brush is needed here – just toy with words and watch as incredible art takes shape before your eyes.🎨🚀
What are we going to do?
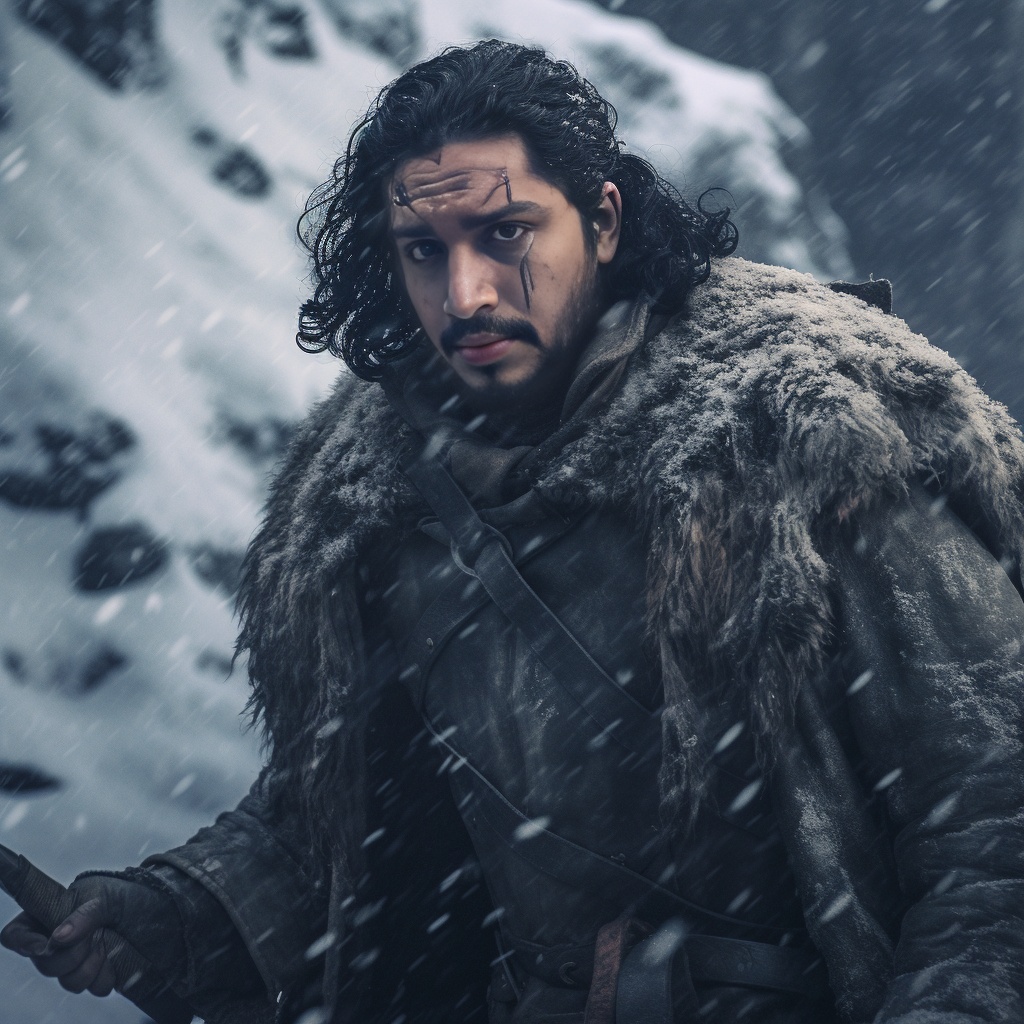
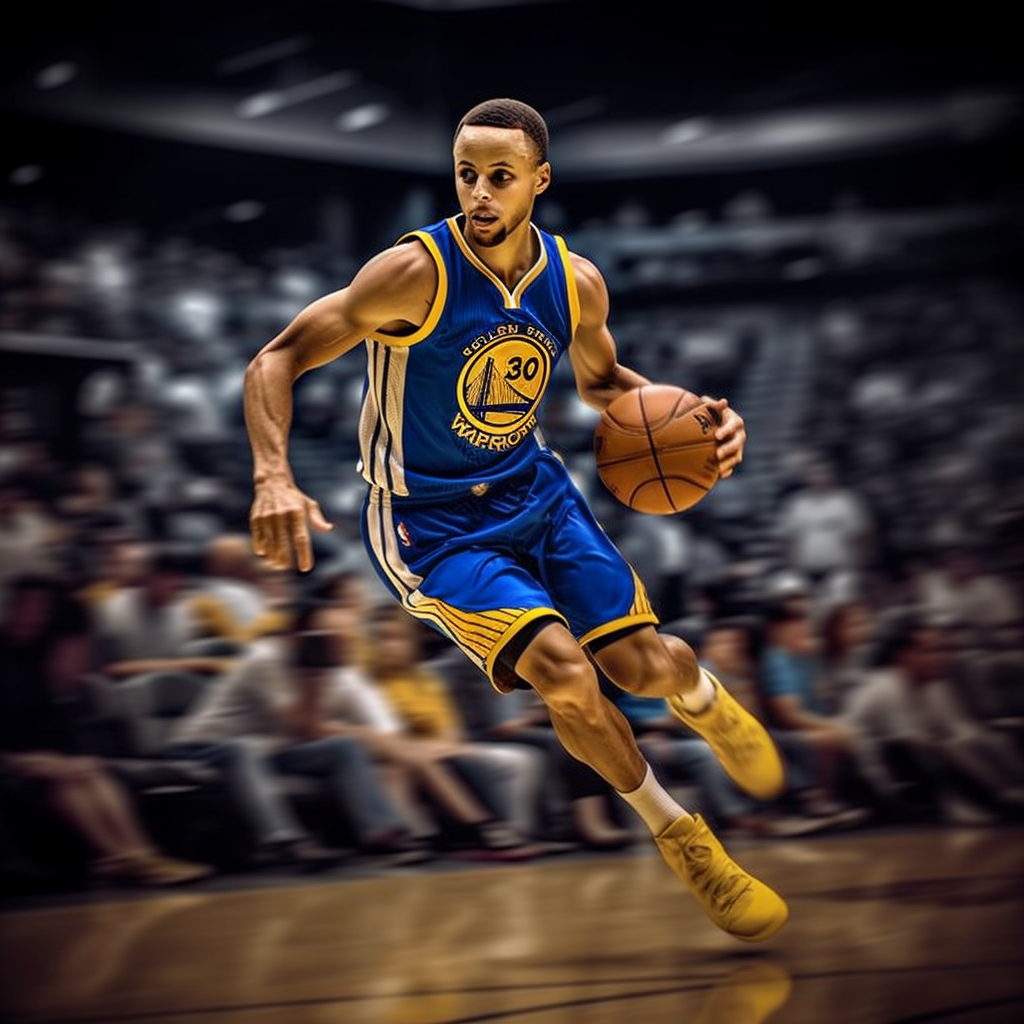
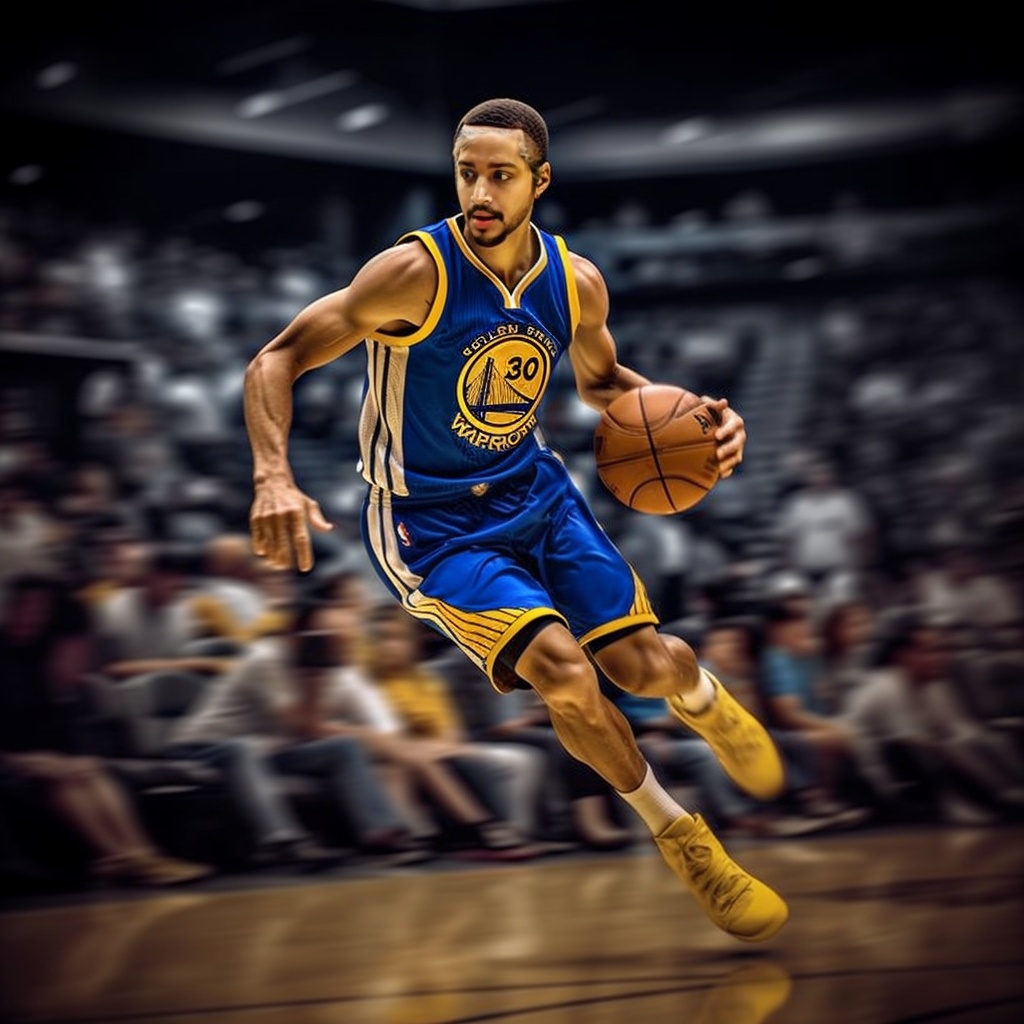
Today we are going to take one step ahead, we are not only going to generate images but we are going to place ourselves into that image. Take a look at these mind-blowing results below where I’ve swapped places with Stephen Curry and Jon Snow 🤯, all thanks to the magic of the Midjourney app. So buckle up, because this is gonna be awesome!
If you are new to Midjourney? then take a look at this article to get the lowdown on how to kick things off. First things first, you’ll need a paid account for this**

Assuming that you have a Midjourney paid account, if not please get one as it is the mandatory requirement. Midjourney runs on the Discord server, it is where all the magic takes place
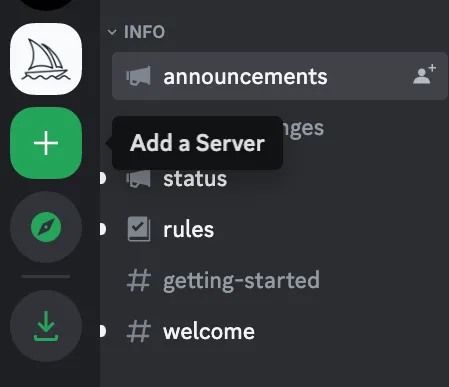
1. Create your server 🏠
If you already have your own server well and good, if not, add a new server from the side panel by clicking the “+” button in Discord.
We will be using a third-party app to do the face swaps, creating a server will be needed to set up that installation.
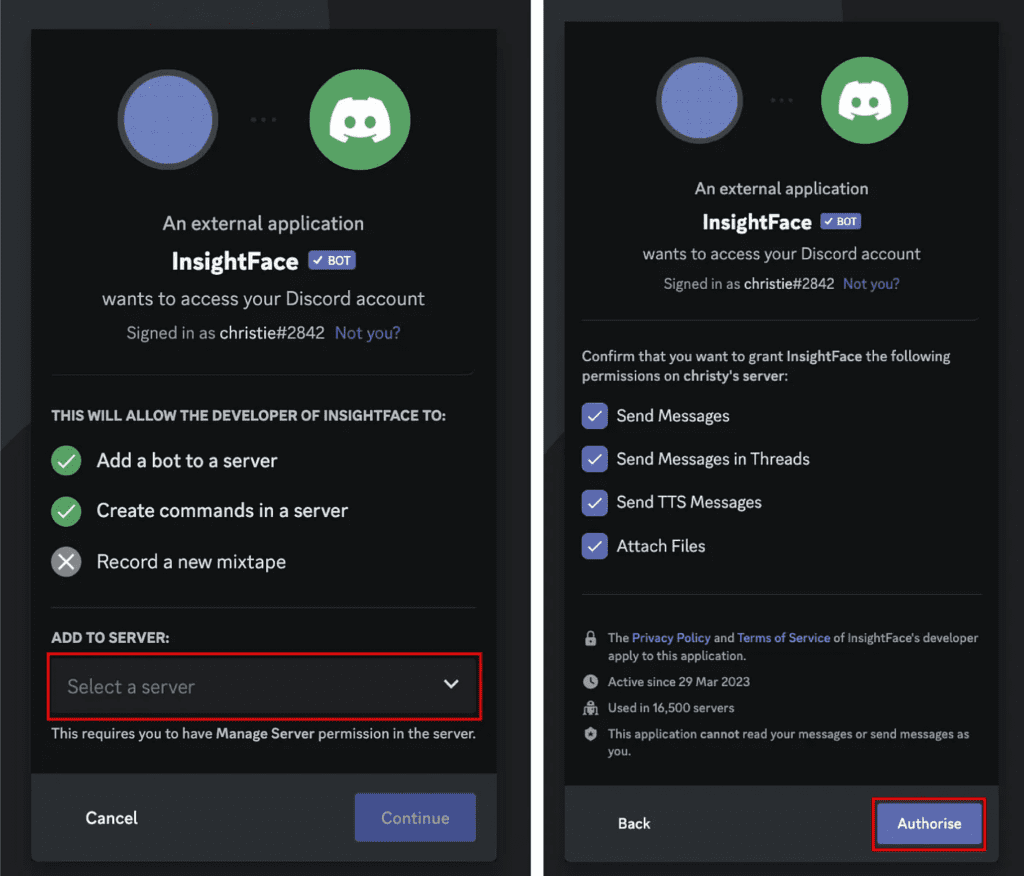
2. Invite Insight Face Bot to your server 🦄
What is Insight Face?
InsightFace is a free tool that’s awesome for working with faces in 2D & 3D. It’s got all the cool features for face recognition.
Let’s bring in the Bot 🤖
Click on this Invite link from Insight Face ♦️
Alright, once you hit that button, it’s going to ask which server you want to add it to. Pick your server from the list, and voila! Insight Face is now set up on your Midjourney account and you’re all set to roll! 🚀
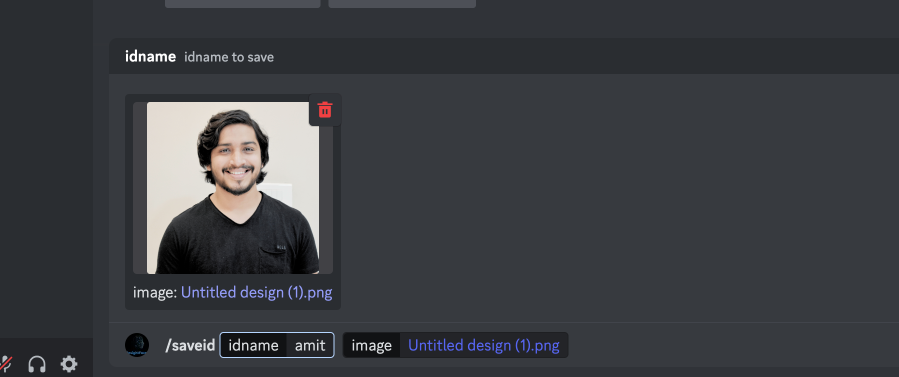
3. Upload your photo 👨🏻🏫
Head over to your Discord server and type in this command: /saveid.
Then, it’s going to give you the option to upload a picture.
Choose a clear, front-view pic – think passport photo, but way cooler
When you upload it, you need to give it an ID, like a nickname (for example, ‘Jens’ as shown in the screenshot).
You can upload heaps of pictures and later just call them up by their ID name!
4. Create an Art to Swap 🎨
Create an artsy portrait with Midjourney. Pick your fave and make it bigger using the “U buttons”. I put together a portrait of my all-time favorite basketball star, Stephen Curry! 🏀🌟
Feel free to create yours as you wish

5. Swap Time 🔄
Time for magic! Right-click on the image, pick “Apps – INSwapper”, and let the bot do its thing.
The face will be swapped in a few seconds 🎉😎
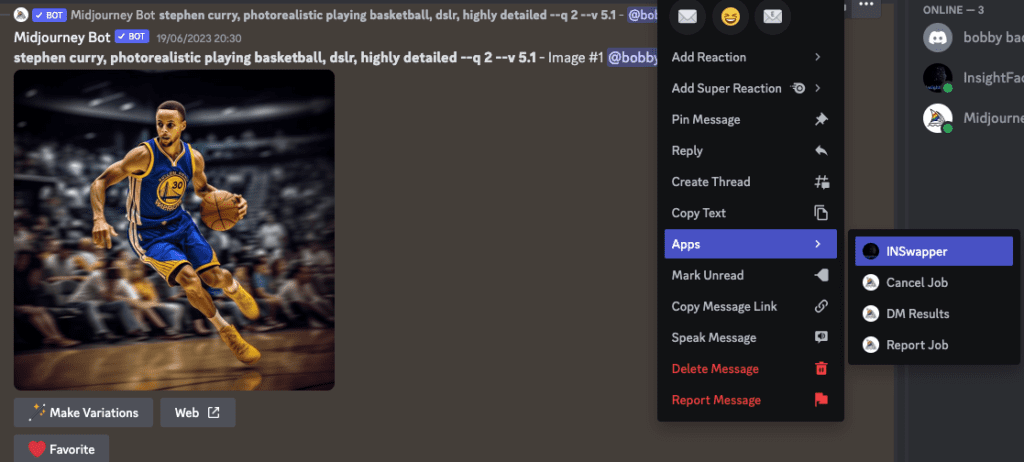
The result of the face swaps, is incredible isn’t it?
Not just Midjourney pics, you can use your own photos too! Just type “/swapid”, put in the id name, and upload a pic.
Note: After you create an identity, it’ll be your go-to default. But you can switch it up anytime with the “/setid” command. This lets you change the default identity name when making images through the right-click menu.
6. Bonus ⭐️
Here’s a cheat sheet for other commands you can use:
/saveid name+ your pic: Upload and register your pic./setid name: Set the pic for swapping./swapid name+ your pic: Swap the faces!/listidCheck out the pics you uploaded./delid name: Say bye to a pic./delall: Clean slate, remove all pics.
In the article above, we took a dive into how to swap faces in Midjourney. Hope you picked up a trick or two! Now go ahead, have a blast, and let your creativity run wild! 🚀✨
#FaceSwap #InsightFace #DIYArt